Showing posts with label Crafts. Show all posts

Monday, November 17, 2014

Octopus Baby costume


McKenna's Halloween costume ended up being a major hit this year for Halloween.


Yup, you guessed it, she was an octopus.

In all honesty, I was concerned it wasn't going to come out the way I had envisioned because it really came down to the wire. I hadn't tried the whole finished product on her until the day before Hallowen so there really wouldn't be much to do if it hadn't worked out! It turned out better than I had envisioned!

I came across several tutorials on how to make this costume easy and inexpensive. Per Usual, I made this craft project more difficult than it needed to be, and I often do that. It's just my personality. Why have things simple when they can be super complex?!

What you need for the tentacles:
  • 4 pairs of stockings/men's socks (or 8 pairs if you want to keep the stockings)
  • Thick Elastic (I used 1.5 inches)
  • Pillow Stuffing
  • Sewing Materials (needle/thread)
  • 1.5 inch ribbon (optional)
What you need for the hat:
  • Beanie
  • Buttons
  • White felt
  • Plastic string
  • Hot glue gun
I was originally concerned because I was finding stockings at like $5/pair... I was not looking forward to forking over $20+ on octopus tentacles that I could never use again. I lucked out finding pink stockings on major discount .... $1.50 a pair! I was able to nab all the same color too!

#targetdoesitagain

There is a way I have read to do this in order to salvage the stockings (hence the suggestion for 8 pairs of stockings), but it seemed complex and I found them at a good enough deal to not worry about it. I believe you end up tucking the second leg into the first leg.... but again, my brain was frazzled so don't quote me on it. Not sure what we would do with identical pairs in the same size and color anyway!

I started by stuffing the legs of each of the stockings with pillow stuffing (which a $5 bag was MORE than enough).


I then cut the legs off of the stockings. I suppose you could cut them first, but since this was my first try I didn't know how far up I wanted to stuff them.

With all 8 tentacles stuffed and cut, it was time to start attaching them to the elastic.

To get the elastic ready: measure around the child's waist and then double it. The reason you will be doubling the elastic is because you essentially will be sandwiching the top of each stocking within the two layers of elastic. I started out affixing them the tentacles with safety pins.


You'll want to do this so you can space the tentacles out evenly around the elastic. The spacing may depend on if you are making this costume for a crawler or a walker, then again, you'd likely want them space around the back with a gap in the front either way.  That way there is a bit of space in the front for their real legs to crawl/move/walk.


With the tentacles pinned, I began sewing.  NOW, I AM NOT A SEWER. I don't know the first thing about sewing.  But I figured just taking a needle and thread in and out a ga-jillion times would make the tentacles stay long enough to make it through the night. And to make it a little more appealing, I sewed both the top and the bottom of the elastic so it looked finished off (I don't have a picture of this, but I don't need to go flashing my awful sewing skills around the internet anyway).

The beanie was a hat we had lying around that had never gotten any use. I just cut oval shapes out of felt, glued on 2 black buttons, and cut some plastic-y type string from the craft store for the eyelashes.


I paired it all with a basic, pink onesie, again, that we had lying around.

 
And to address the [optional] pink ribbon. Since I used white elastic and her entire outfit was pink, I wanted to mask it in some way. Additionally, I also wanted something that was darker pink somewhere else in her costume other than her hat.  It helped pull the whole costume together. All I did was measure out a ridiculous amount of ribbon, centered it in the front/middle of the elastic, and ran a couple of stitches through it. I didn't sit perfectly over the elastic, but just kinda flowed around it and took attention away.
 

My Little Octopus was a hit.... and now, Momma is just having a hard time finding out how to store these suckers.  Because of course, there's no way you can get rid of Baby's First Halloween costume!

You can see a few more pictures of her Halloween Costume here.

Thursday, October 31, 2013

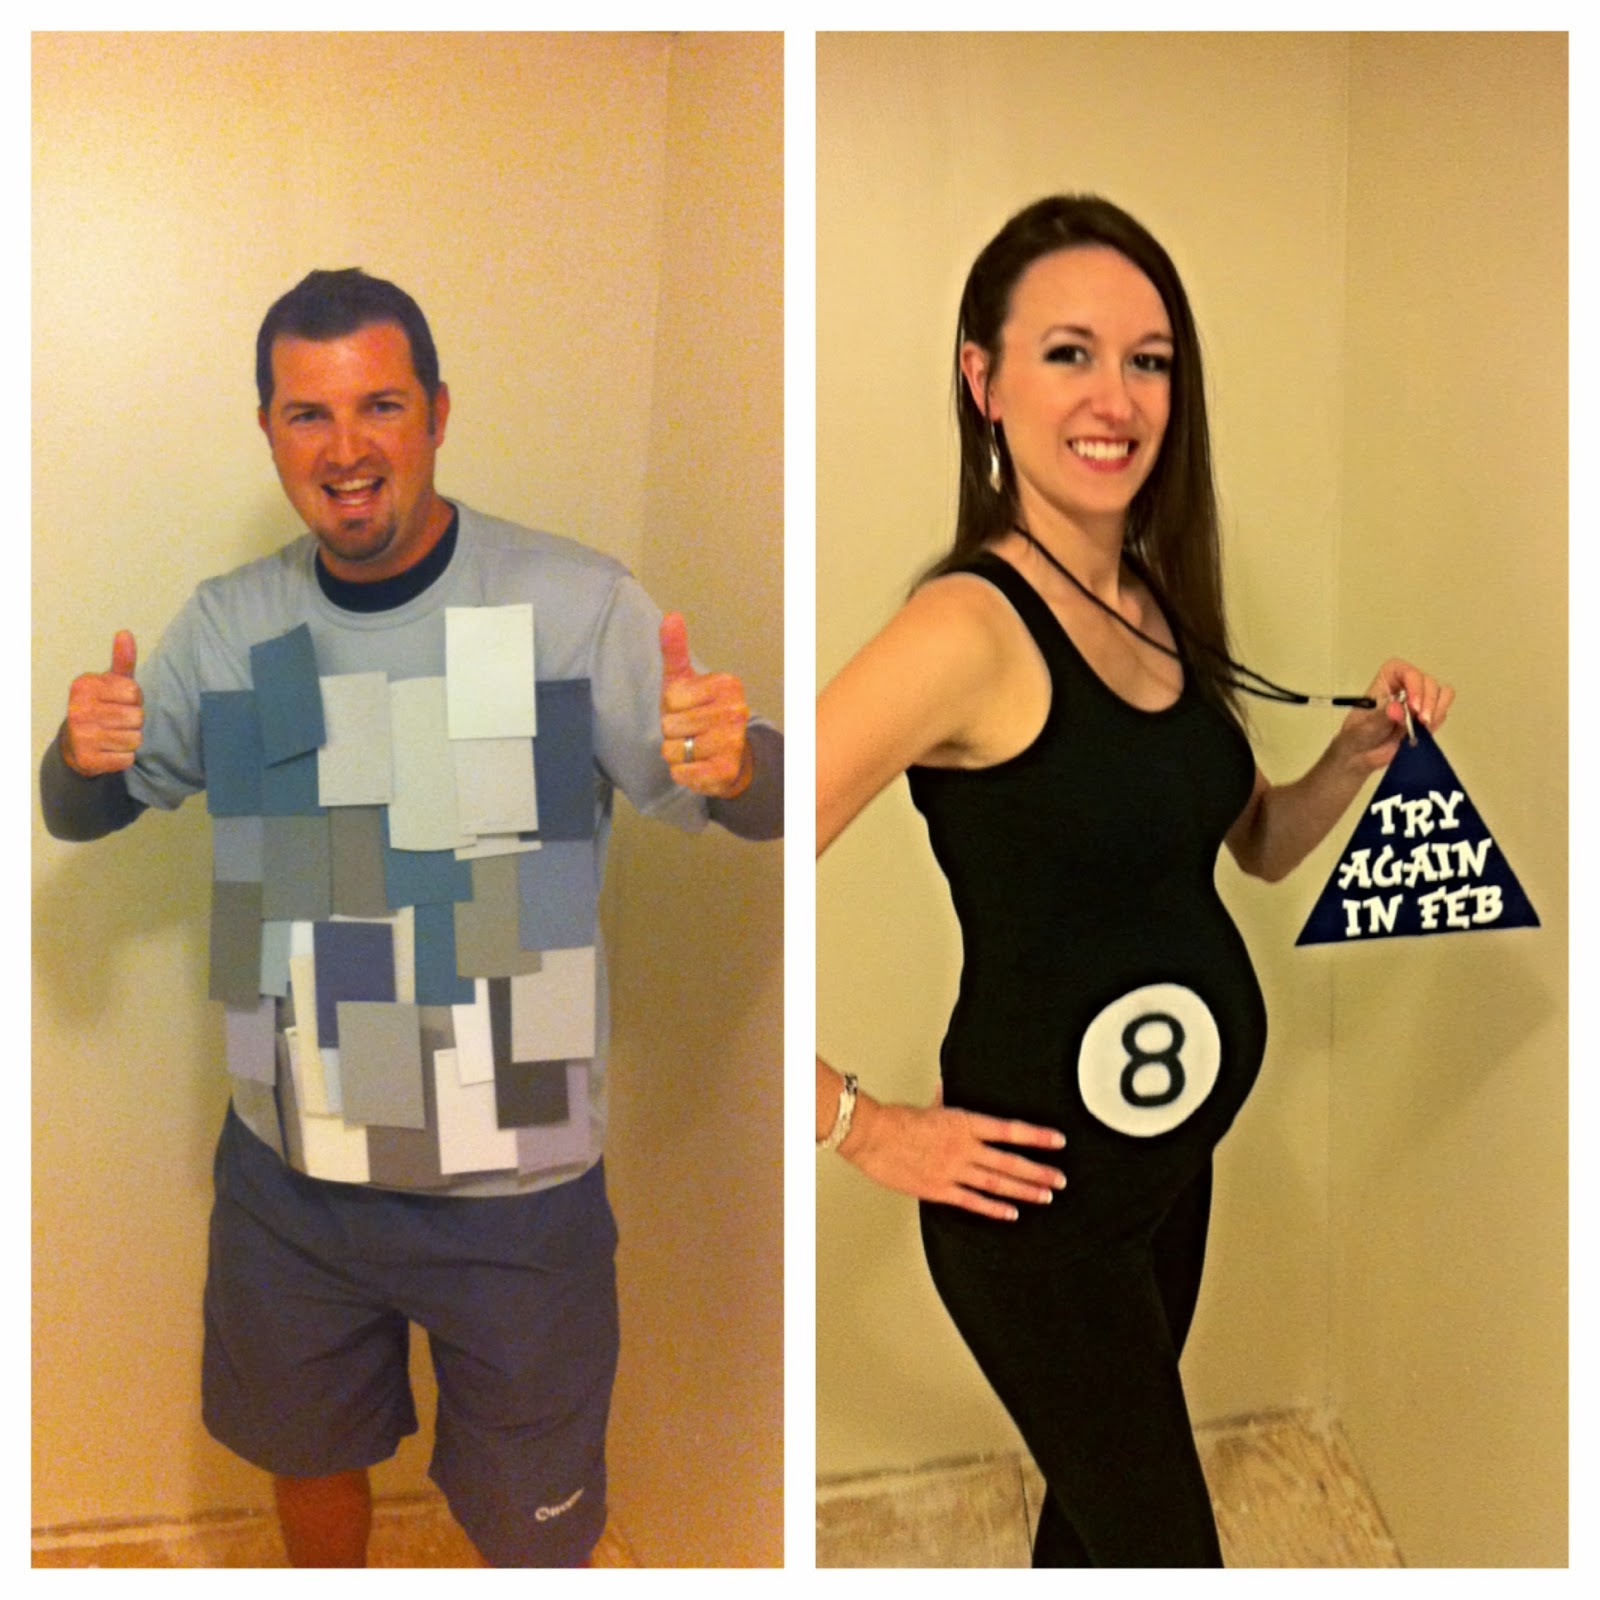
Halloween costumes: 50 shades & Magic 8


Kevin and I had a Costume party to attend last week for Halloween, and I knew this would be difficult for me.  In year's passed, I have always found something "revealing" to make out of old clothes from college and high school, but clearly that wouldn't work this year.

And I prefer creating costumes than buying them, both because I like an excuse to be creative and make something and also because I hate spending money on something you'll never use again.

Luckily I always have the help of my very ambitious Momma whom, once given a task such as this, will inundate you with anything and everything related.  So, when I emailed her to asked for help for costume ideas just 2 days before the party, I immediately received email after email with links for ideas. Creative juices combined and flowing, we narrowed in on the Magic 8 Ball.

And making this costume couldn't have been any easier.  Black leggings from the closet, black tank from the closet, and felt. For the 8 on my belly, I used white felt with a sticky back, I believe it was $1.49 at A.C. Moore.


And for the triangle with your fortune, that was the stiff type felt, which was also a dollar something.


We haven't gone out much since I got pregnant, so it was nice to get all dolled up for once.


And for the record, if you notice there is a distinct shadow, making my belly look much larger than it is! Whew, it scared me when I first looked at the pics!

Kevin had come across his idea online somewhere for 50 Shades of Grey, so we made it a mission to begin snagging paint samples at home improvement stores. It only took a couple of stops before we had well over 50 samples.


It seemed simple enough, I laid it all out to make sure we had enough.


I had warned Kevin that his idea to simply duct tape the samples on a shirt likely would not hold. After spending 30 minutes of sticking individual pieces on, the moment he began walking around was the moment they started dropping one-by-one.  Ugh.  After several attempts of getting this to work out and pinning certain ones, Kevin had given up.

After taking a breath and thinking outside the box, he began laying all of the samples out face down on the bed and began taping the backs together.  This pretty much created a shield.  We then took this shield and pinned it on, and Voila! 50 Shades. Not exactly how we planned but it worked nonetheless.


I think we both had a couple of simple and creative costumes that were a lot of fun!! 

Happy Halloween and be safe!!

Thursday, October 10, 2013

It's fall craft time: front door wreath


It's really not fall until you've pull out all of your autumn colored faves and decided on a new craft project to freshen up your decorating. I started on this bad boy last month when Kevin was on his business trip.


I spent a lot of time pondering what I wanted my wreath to look like. Spent several painstaking hours searching pinterest and browsing Michaels, A.C. Moore, and Hobby Lobby.  Oh, the things you'll do to satisfy your creative desires.

Here is the final product:


I would love to give credit to a crafter for ideas, but if you do a search for "Fall Wreath" on Pinterest, you will see a plethora of ideas and create your own from what you see.

This wreath was pretty simple, unless of course, you are a perfectionist like me.  Anyway, here's the materials I started with:


While I didn't keep the receipts, everything in total came out to less than $23-24, with items from Michaels and A.C. Moore.

After laying it all out and getting an idea where I wanted everything placed on the wreath (yes each leaf and pumpkin meticulously placed one-by-one), I started on what would be the most difficult thing for me to accomplish: The bow.  I am terrible with tying bows, and it's even more difficult when you are working with something that is thick and not easily knotted like burlap.  So........ I faked it.


Instead of actually tying a bow, I looped the burlap and bunched it in the middle with the floral wire I had on hand.  Then I simply covered this little mess another small piece of burlap to make it look like the knot.

One thing to keep in mind with burlap is its uncanny ability to fray! I actually like the looks of the ends fraying without worrying about it continuing to fray.  So I put a small layer of hot glue on the back end of the burlap about a half an inch up.... that way it gives room for naturally fraying but won't ruin it.


After completing the bow, I started on the part that kills my perfectionism..... attempting to glue the leaves in the exact same spot I placed them when laying them out.


Woah-is-me.  They never go back exactly how they were placed.  Nevertheless, 10 glue sticks later they always still look good.


Then I painted the letter P, and spent a fair amount of time hot gluing this guy to make sure he stays on for a while.


The color doesn't look as pink in real life, it's a red with a metallic hue.


I finished the wreath by attaching the burlap bow with thin floral wire. And voila, the finished wreath.


My boys interrupting my photo sesh with the wreath (unfortunately caught with my iphone and not with my rebel). This wreath is just what my crafting itch needed, but just got my juices flowing.... ready to get back to the crafting table before it's too late to craft for fall!!